
DiY Streamdeck / Macro keyboard
Turn an arduino into a small form-factor macro keyboard to shorten your shortcuts and be more productive.


If you have ever needed some extra keys on your keyboard for easier to reach shortcuts or automation you probably heard about macro keyboards.
While there are easier and maybe cheaper ways, with software like AutoHotKey, to "reprogram" a second keyboard I decided to make my own macro keyboard. This has several reasons: For one it is smaller than most keyboards. Then it also costs less if you have the right parts already lying around.
For my setup, I used a Teensy 3.0 as an HID to simulate certain keys, combination or even text input.
The example code I provide does two things that I found useful with a bit of extra setup (changes may apply if another controller is used):
- Mute/Un-Mute on Discord
- Hold 'W' key for games where you have to move your character for a long distance
- Hold the left mouse key until another press to release it
My parts are as follows:
- Teensy 3.0
- Some old remote's plastic keypad
- Board to solder on
- 3D printed housing
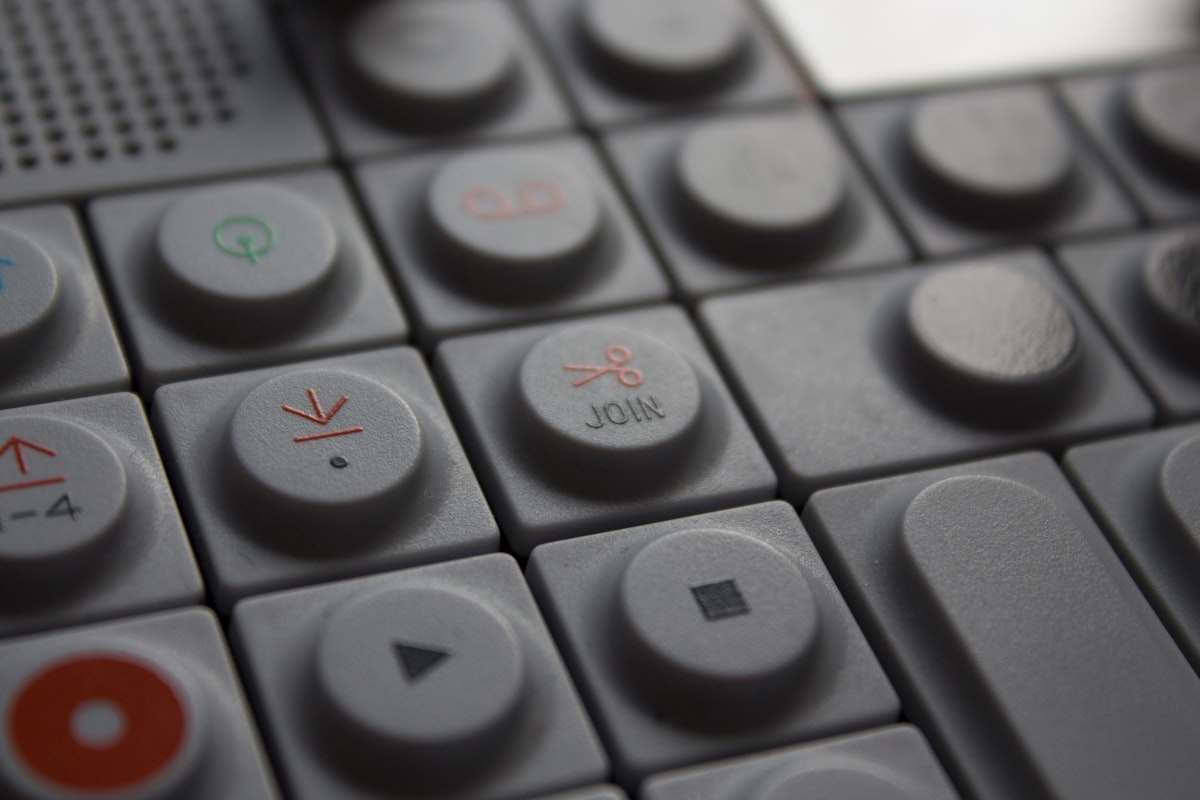
Now the steps are pretty forward. I soldered some cables quick and dirty to the board, created contact points and put everything into a 3D printed case. The plastic keypad I used is one with conductive pads on the botton (black circles in picture) which was in found in an old remote. The cabling may be changed according to your needs. In my case connecting one side of the key ports to the analog pins and the other side to 3V was sufficient. The output of the analog pins with 10 bits would be 0 - 1023.
If you are using another Arduino you should checkout how to reflash the firmware to act as an HID device. Arduino itself has an article about it in their references.

int button[5];
bool curPressed[5];
bool pressedD = false;
bool pressedM = false;
void setup()
{
  Serial.begin(38400);
}

void loop()
{
  // set button array to analog pins
  for (int i = 0; i < 5; i++) {
    button[i] = analogRead(i);
  }
  // button 1 pressed
  if (button[0] > 1000) {
    // check holding
    if (!curPressed[0]) {
      curPressed[0] = true;
      Keyboard.press(MODIFIERKEY_ALT);
      Keyboard.press(KEY_L);
      Keyboard.press(KEY_M);
      Keyboard.release(MODIFIERKEY_ALT);
      Keyboard.release(KEY_L);
      Keyboard.release(KEY_M);
      Serial.println("button 1");
    }
  } else {
    curPressed[0] = false;
  }
  // button 2 pressed
  if (button[1] > 1000) {
    // check holding
    if (!curPressed[1]) {
      curPressed[1] = true;
      if (!pressedD) {
        pressedD = true;
        Keyboard.press(KEY_W);
      } else {
        pressedD = false;
        Keyboard.release(KEY_W);
      }
      Serial.println("button 2");
    } else {
      curPressed[1] = false;
    }
  }
  // button 3 pressed
  if (button[2] > 1000) {
    // check holding
    if (!curPressed[2]) {
      curPressed[2] = true;
      if (!pressedD) {
        pressedM = true;
        Mouse.set_buttons(1, 0, 0);
      } else {
        pressedM = false;
        Mouse.set_buttons(0, 0, 0);
      }
      Serial.println("button 3");
    } else {
      curPressed[2] = false;
    }
  }
  delay(250);
}
Pressing a button on it would connect the 3V line with the connected Analog Input on the device. A 3V input would read as an analog integer value over 1000.
Sources
analogRead, https://www.arduino.cc/reference/en/language/functions/analog-io/analogread/ (last visited Mar. 13, 2020).
HID library, https://www.arduino.cc/en/Reference/HID (last visited Mar. 13, 2020).
Using USB Keyboard, https://www.pjrc.com/teensy/td_keyboard.html (last visited Mar. 13, 2020).
Human interface device, https://en.wikipedia.org/w/index.php?title=Human_interface_device&oldid=937206074 (last visited Mar. 13, 2020).